MMSC · Knowledge base

Plan mountain training
properly

Ten steps from account to printed route card, an explanation of every column in the leg table, and the three things that in mountain terrain decide between a route on paper and a route that walks.

Step by step

Getting started with route planning

Work through the steps in order. Each one builds on the last.

STEP 01

Sign up & log in

Create an account first — everything you plan is tied to it and syncs to your phone.

  1. 1.1

    Go to app.milmap.nl and create an account with your email address, or sign in with Apple. Confirm the verification email: without it, a free account is blocked after 24 hours.

  2. 1.2

    Then install the MilMap app on your phone (iOS or Android) and log in with the same account. Everything you plan on the laptop is on your device in the field.
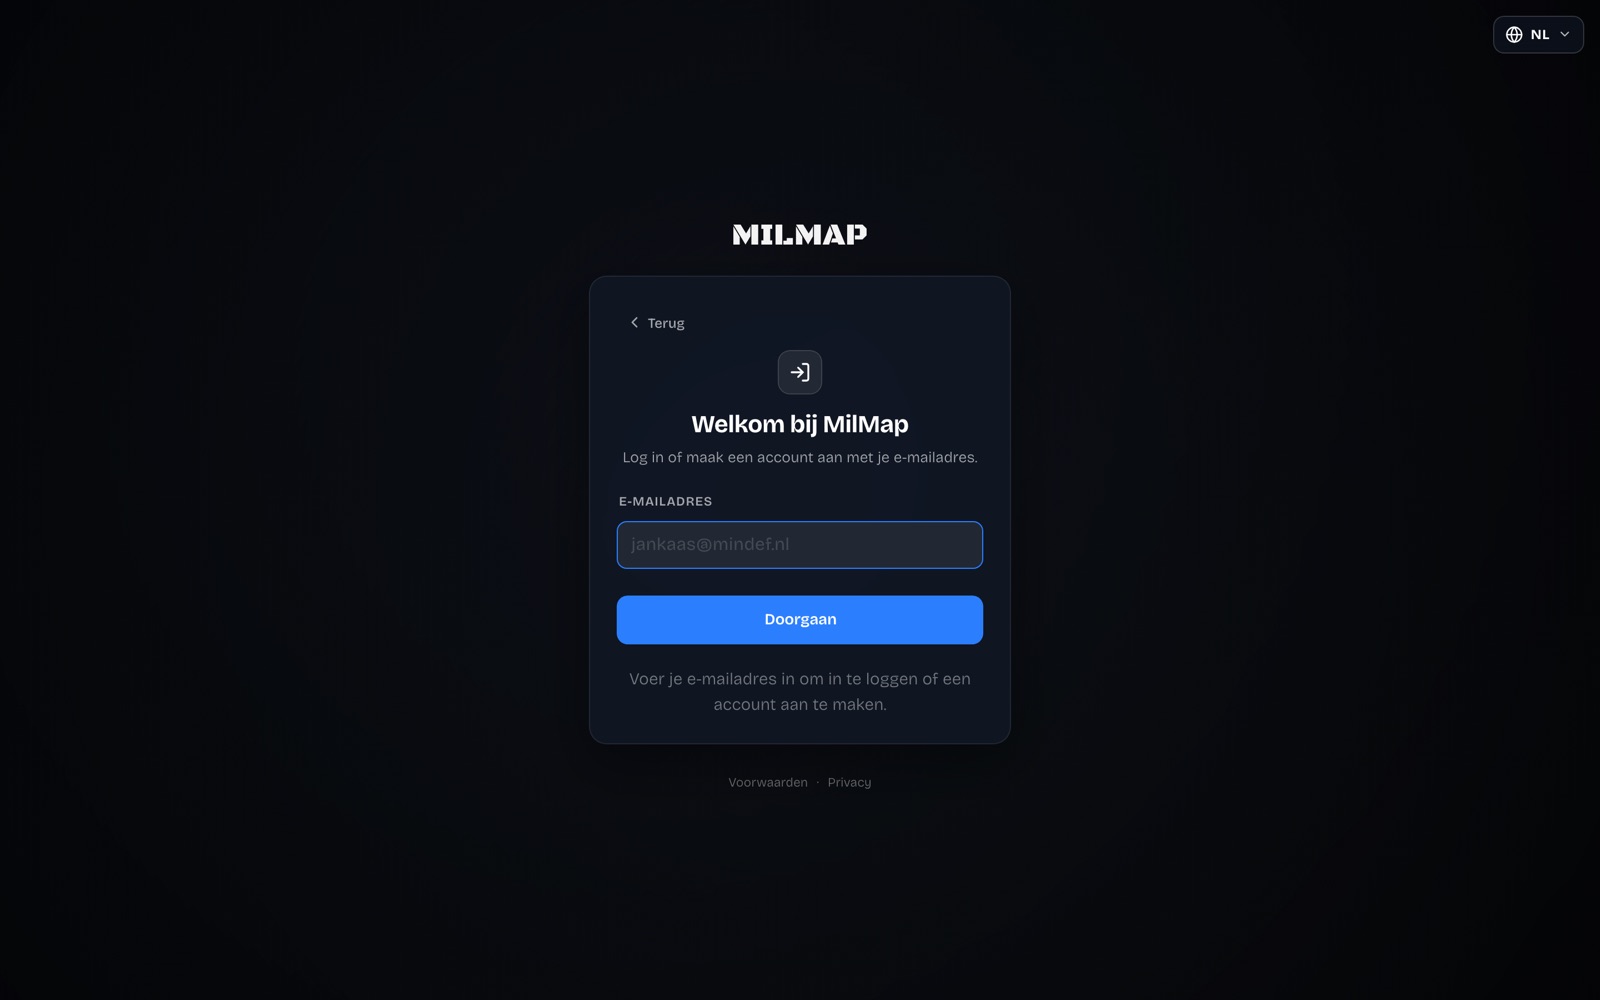
The MilMap login screen, where you create an account with your email address
Guide: account and logging in

Plan on a big screen, navigate on your phone. That is the fastest way to work.
STEP 02

Create a map

A map is your working folder: everything for one exercise or one area lives in it.

  1. 2.1

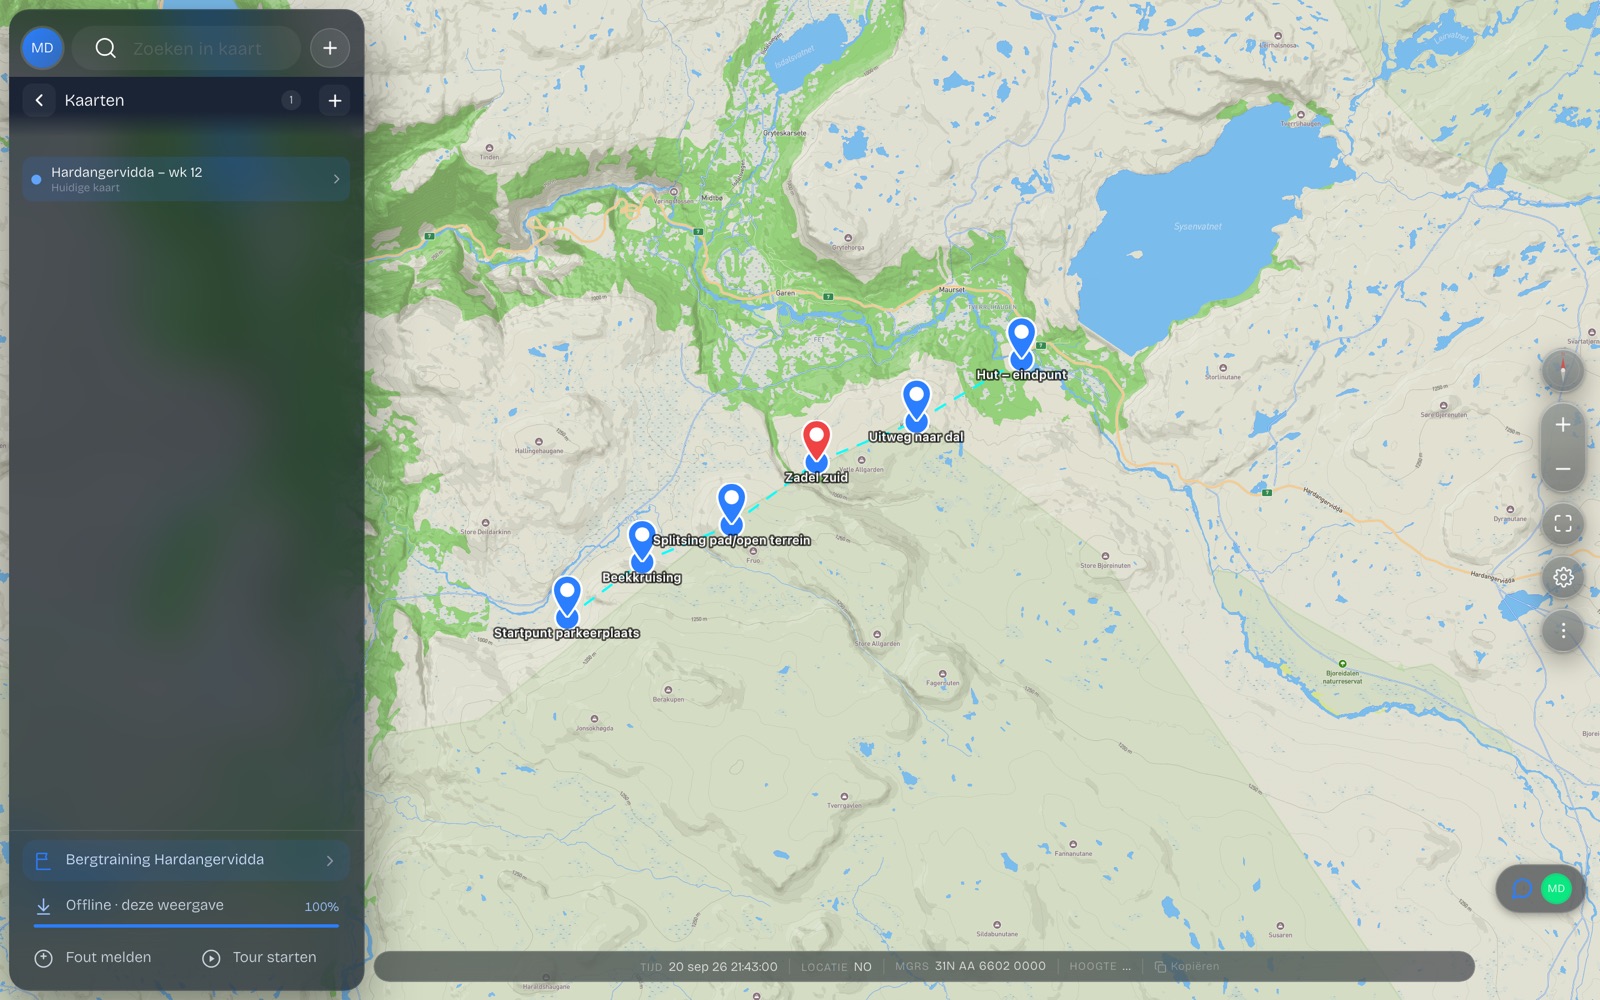
    Open Maps and create a new map. Give it a name you will recognise in the field — the area and the week, for example: "Hardangervidda – wk 12".

  2. 2.2

    Pick your base map. For mountain terrain you work on a topographic base with contour lines; satellite goes alongside it to spot vegetation, snowfields and boulder fields.

  3. 2.3

    Download the area offline before you leave. There is no coverage in the mountains, and a map that has not been cached is a blank map.

The map overview with the map for this exercise
More about map management

Create one map per exercise instead of stacking everything onto a single map. That keeps the overview clear and the app fast.

STEP 03

Build the route card

Draw the route the way you are going to walk it — not the way it is shortest on paper.

  1. 3.1

    Place your route points in order: start point, decision points along the way, end point. MilMap calculates the distance, the height difference and a walking time for every leg.

  2. 3.2

    Work in legs, not in one long line. A leg ends on a feature you can recognise: a saddle, a stream crossing, a ridge, a hut. That way you can tick off and adjust leg by leg.

  3. 3.3

    Record your alternatives as separate routes: a bad-weather variant and a bail-out route to the nearest road or hut.

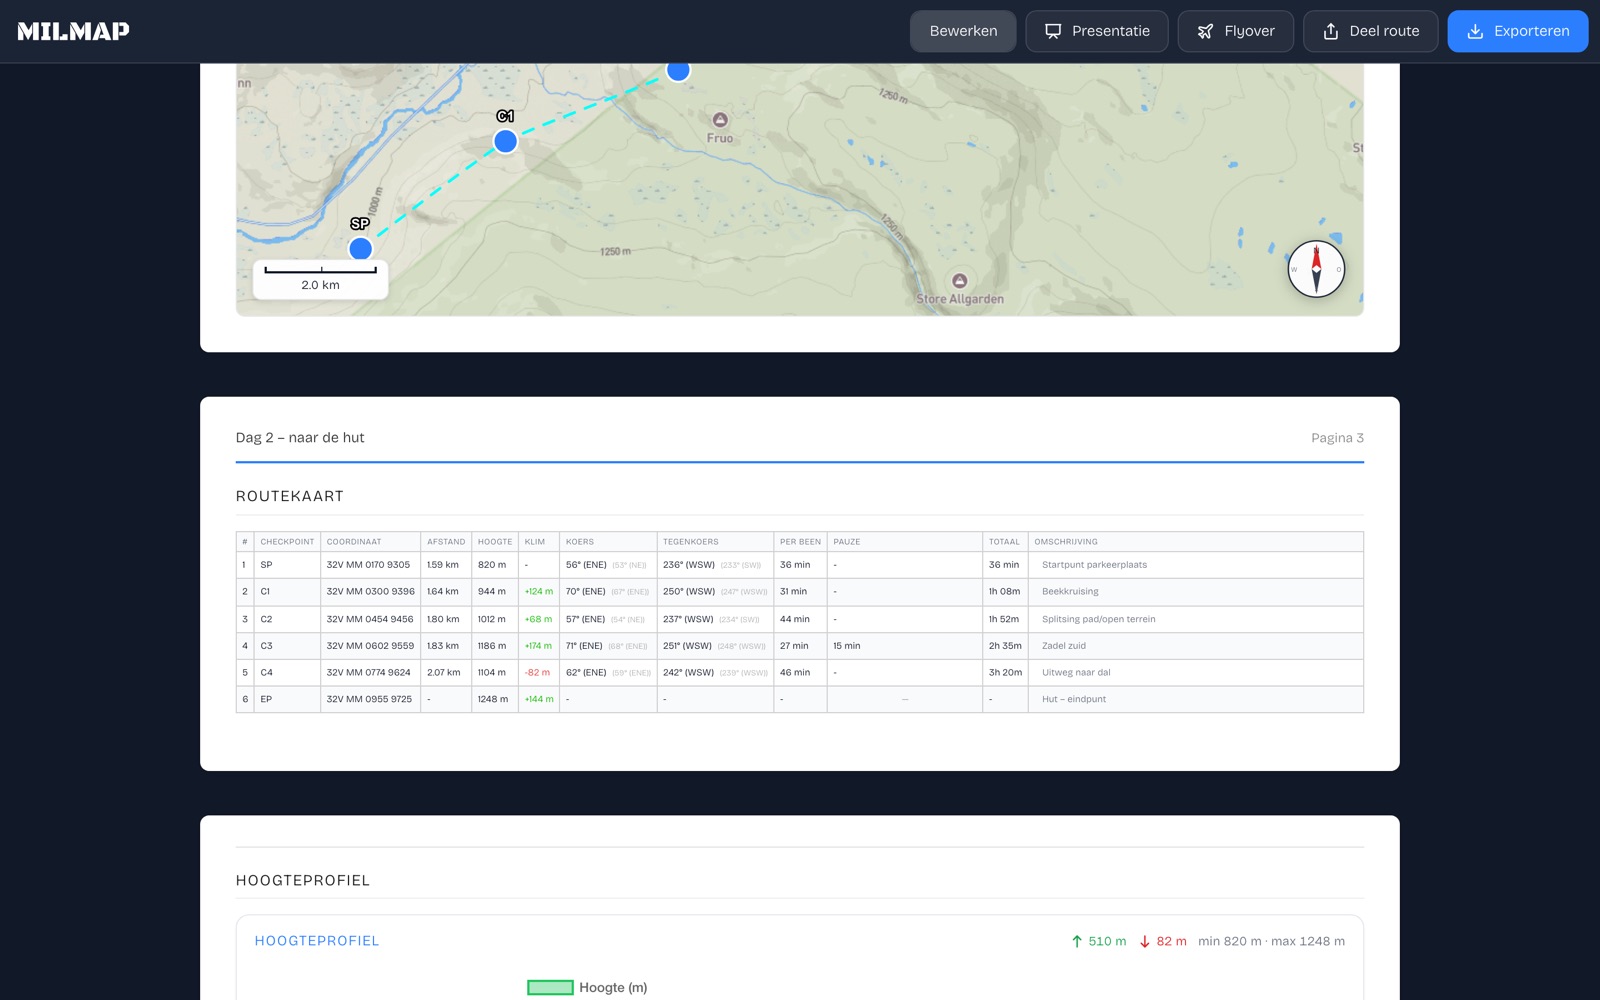
The route card with the leg table: grid, distance, elevation, climb, bearing, back bearing and time per leg
More about route planning

Colour your routes: main route, bad-weather variant and evacuation route each in their own colour. That reads a lot faster in the dark.

STEP 04

Add a mission

The mission is the plan around the map: who, when, and to what end.

  1. 4.1

    Create a mission on your map and put your timeline in it: departure time, planned split times per leg, the latest turnaround time and the expected arrival.

  2. 4.2

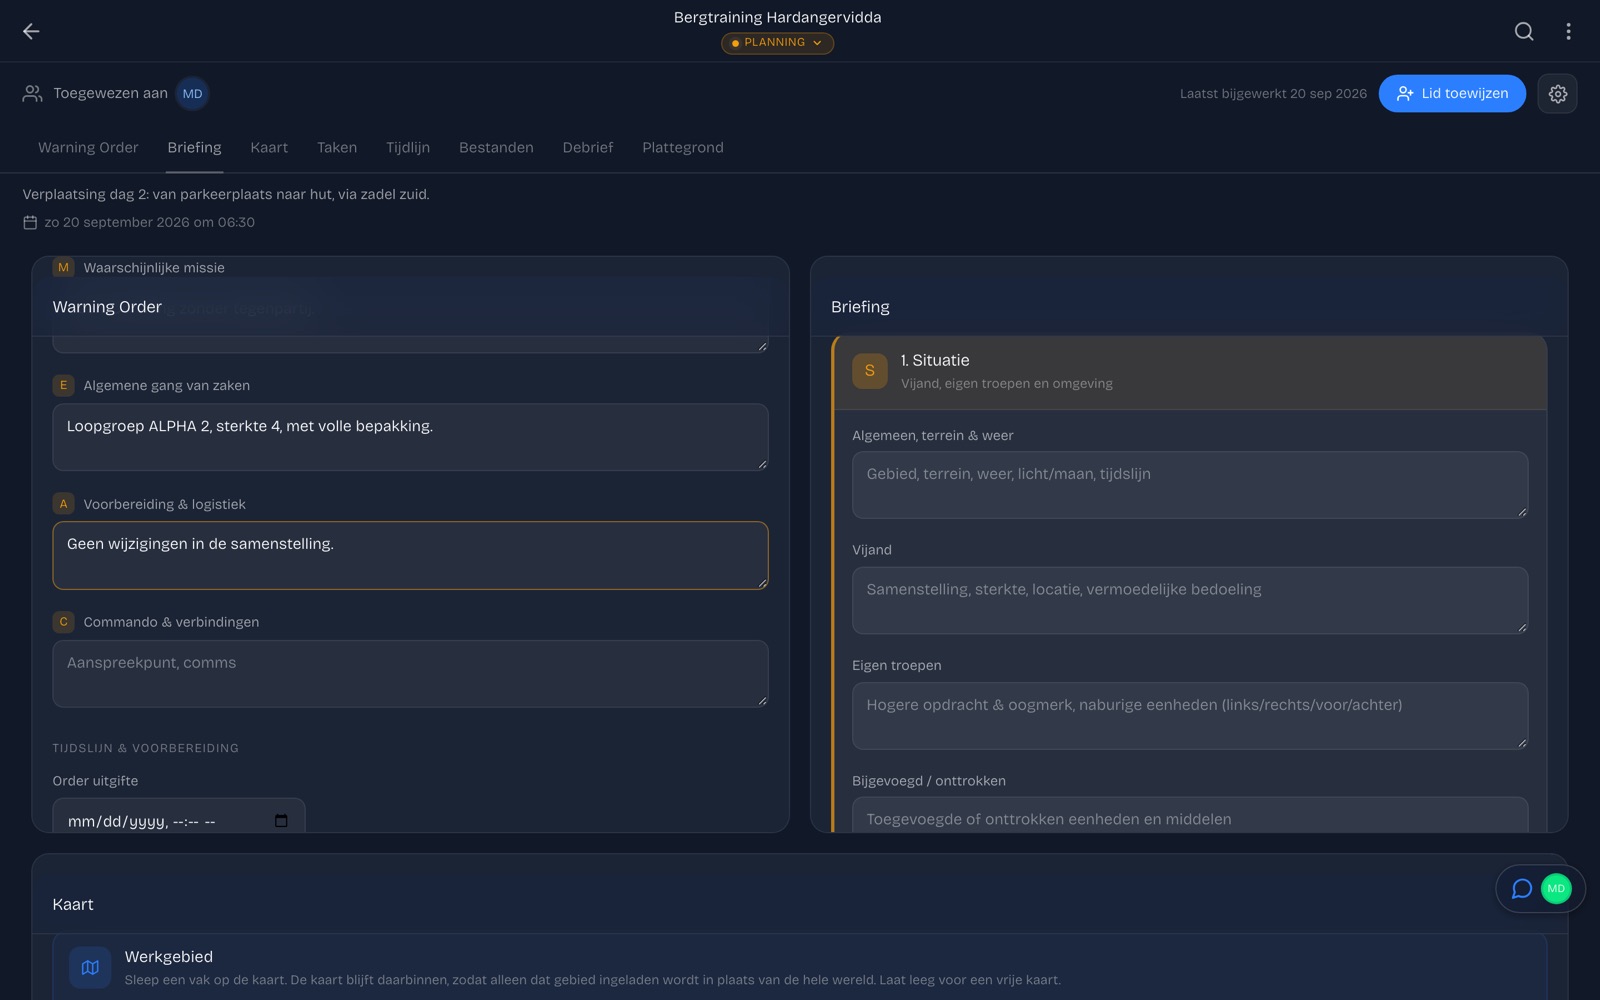
    Fill in the orders using the five paragraphs (SMEAC): situation, mission, execution, service support and command & signals. For mountain training, "service support" should at least hold your water, food and casualty-evacuation plan, and "command & signals" who you call and when you check in.

The mission with warning order and the briefing in five paragraphs
More about the mission module

Put the turnaround time in the mission in writing. A time that is not written down always gets stretched in the field.

STEP 05

Add waypoints

Waypoints are your decision points and your anchors — do not add too many, and not too few.

  1. 5.1

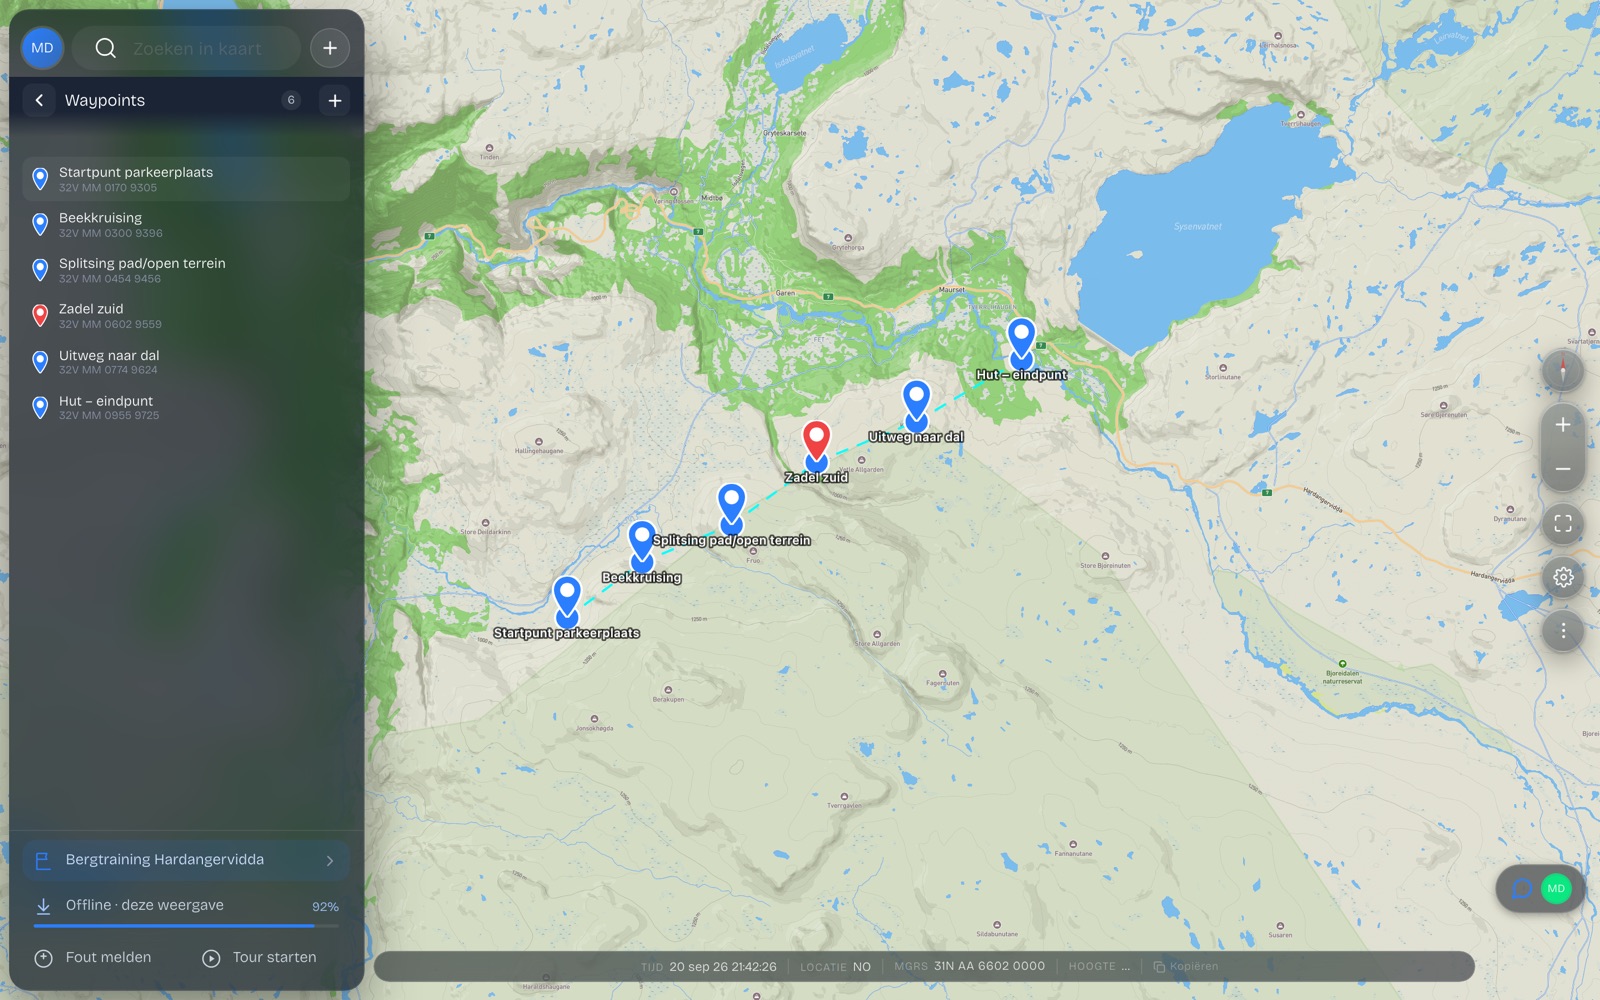
    Put a waypoint on every point where you make a decision or where navigating gets hard: the entrance to a valley, a saddle, a river crossing, the change from trail to open ground.

  2. 5.2

    Give every waypoint a short, unambiguous name and add the coordinate in MGRS, so you can fall back on the grid with map and compass.

  3. 5.3

    Add photos to a waypoint — you recognise a picture of the stream crossing or the gate faster than a description. You can store up to three per waypoint.

  4. 5.4

    Mark hazards separately: avalanche slopes, rockfall zones, fords that close up in the rain.

The waypoint list with the route’s decision points and their MGRS coordinate
More about adding waypoints

A waypoint you would not call out over the radio probably does not belong on the map.

STEP 06

Import from TopoGPS

Already working in TopoGPS? Bring your existing routes and points along.

  1. 6.1

    In TopoGPS, export your route or your points as a GPX file.

  2. 6.2

    In MilMap, open the map it belongs to and use Import to upload the GPX file. Routes come in as a route, loose points as waypoints.

  3. 6.3

    Check the import afterwards: names are not always carried over cleanly, and points called "WP 014" in TopoGPS deserve a real name here.

  4. 6.4

    The same works with GPX from Garmin, Komoot or Google Earth (KML).

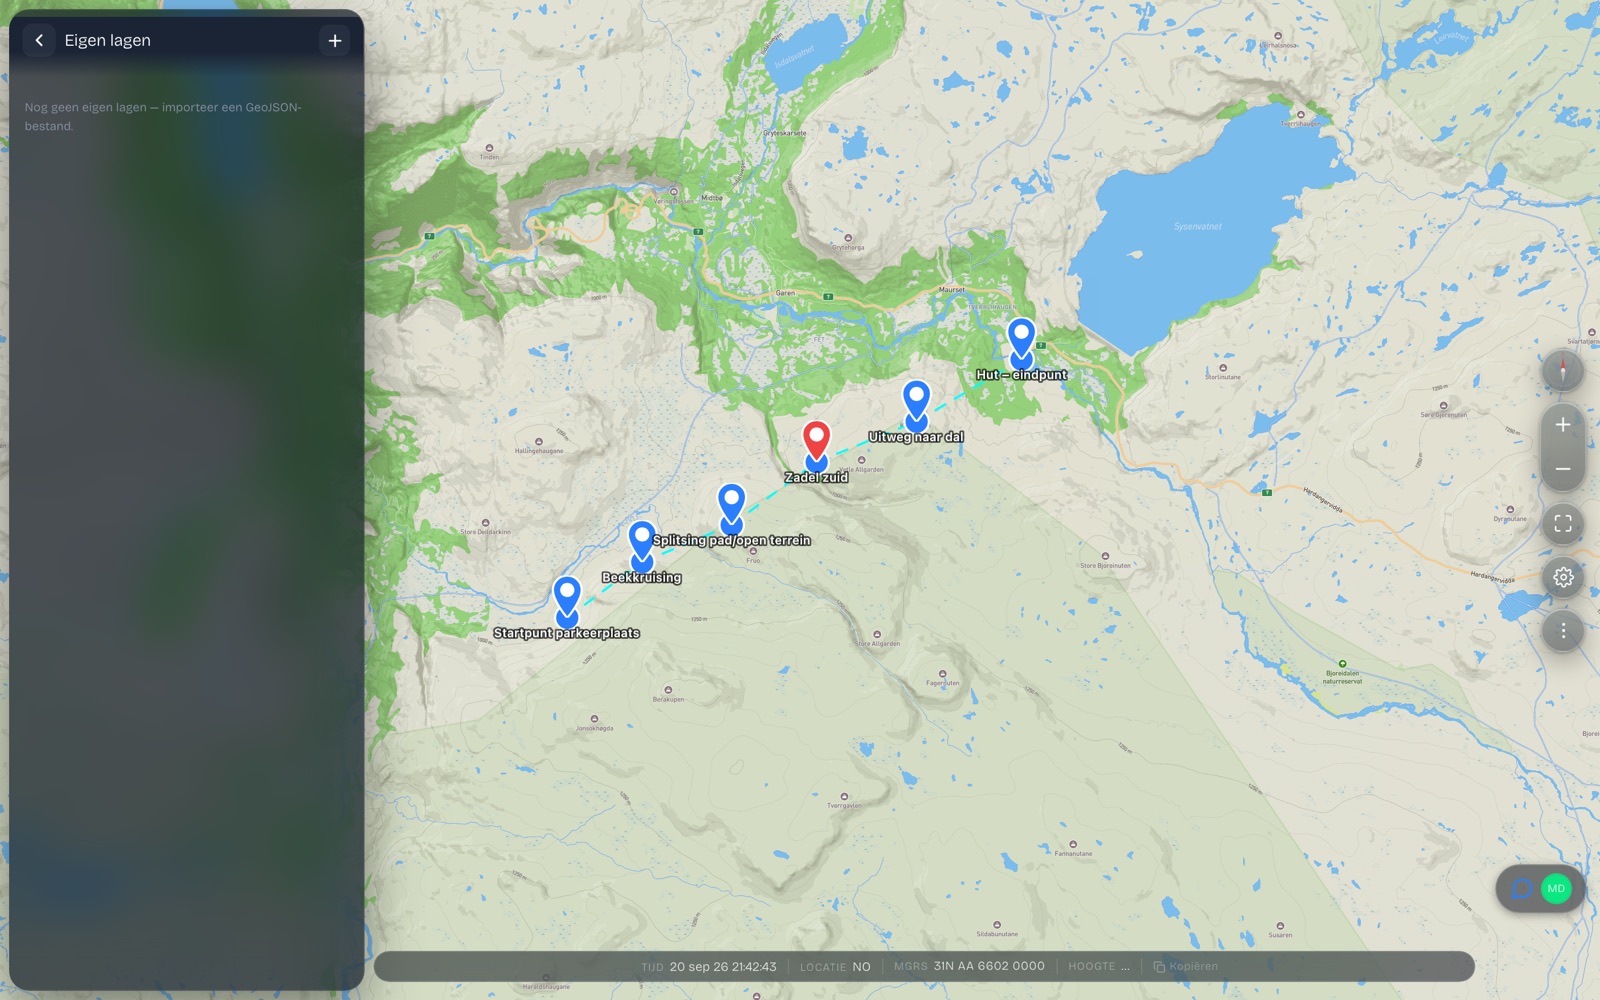
The Custom layers group, where you import a GPX or GeoJSON file
More about the TopoGPS integration

Import first, draw afterwards. Otherwise you end up cleaning out duplicate routes.

STEP 07

Flyover: fly your route in advance

The best terrain study you can do without having been there.

  1. 7.1

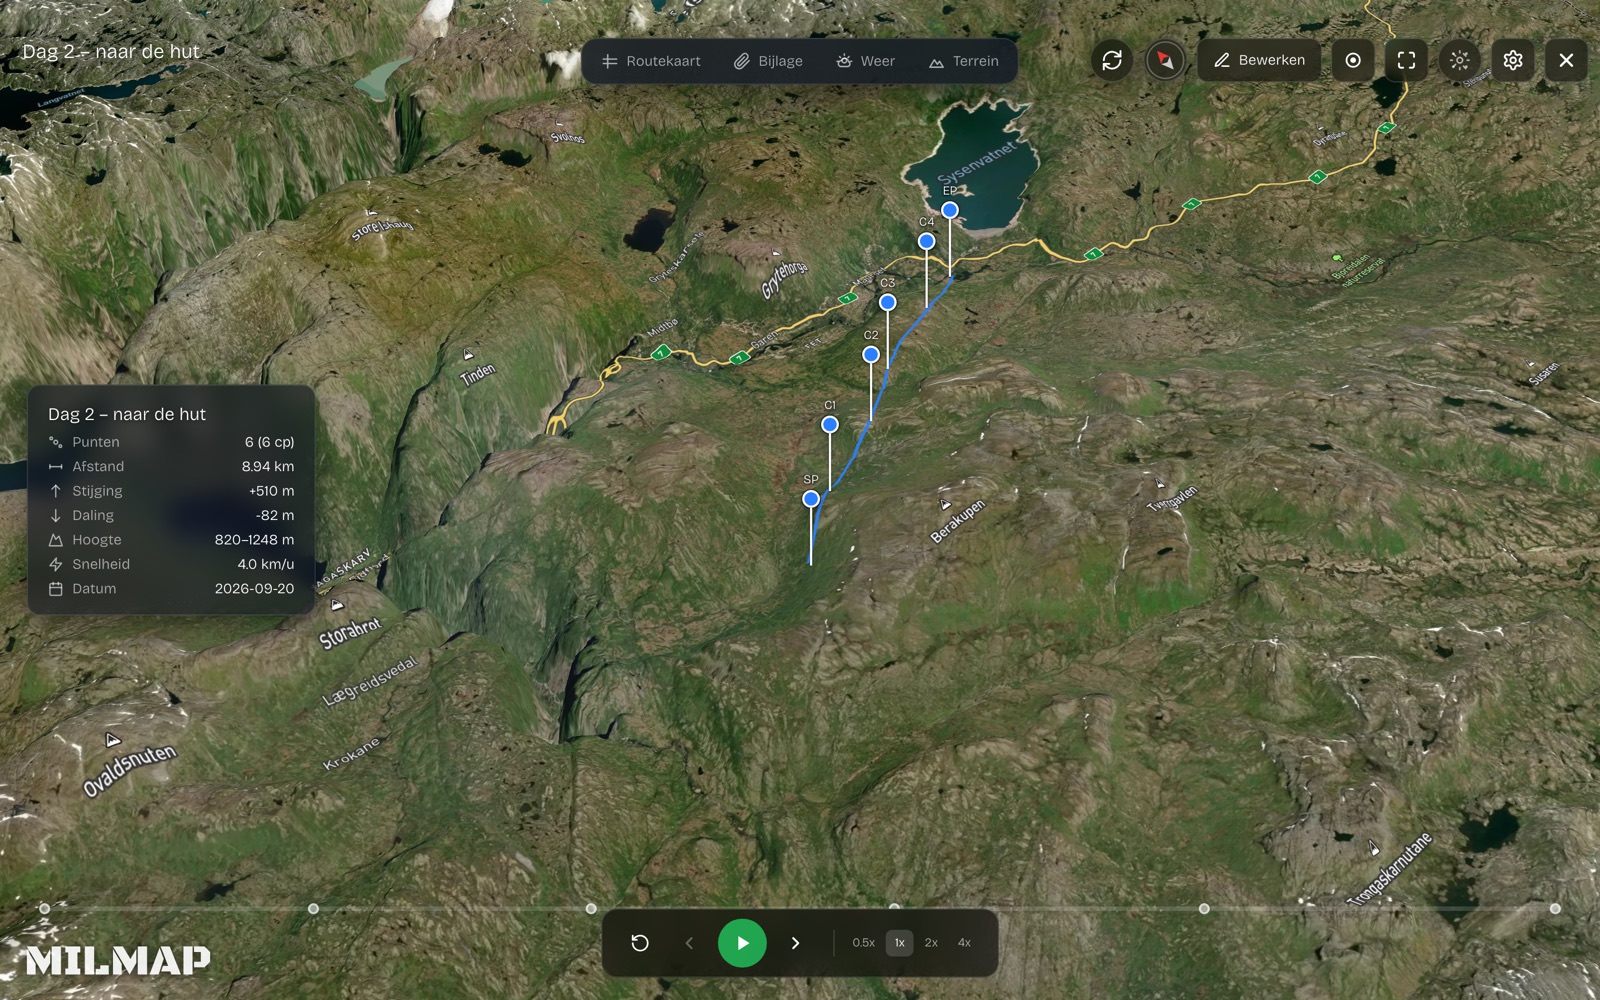
    Start the flyover on your route and let MilMap fly over it in 3D. You see the slopes, the valley cuts and the ridges the way they actually rise.

  2. 7.2

    Watch for three things: where the route really steepens, where you lose sight of your next point, and where there is a way out downhill.

  3. 7.3

    Run the flyover with your walking group before departure. Ten minutes of looking together saves a lot of discussion in the field.

The 3D flyover travelling along the route, with distance, ascent and descent
More about the flyover
STEP 08

Mountain terrain: slope & aspect

Four overlays that turn an elevation map into a decision map — and save you picking apart contour lines by hand.

  1. 8.1

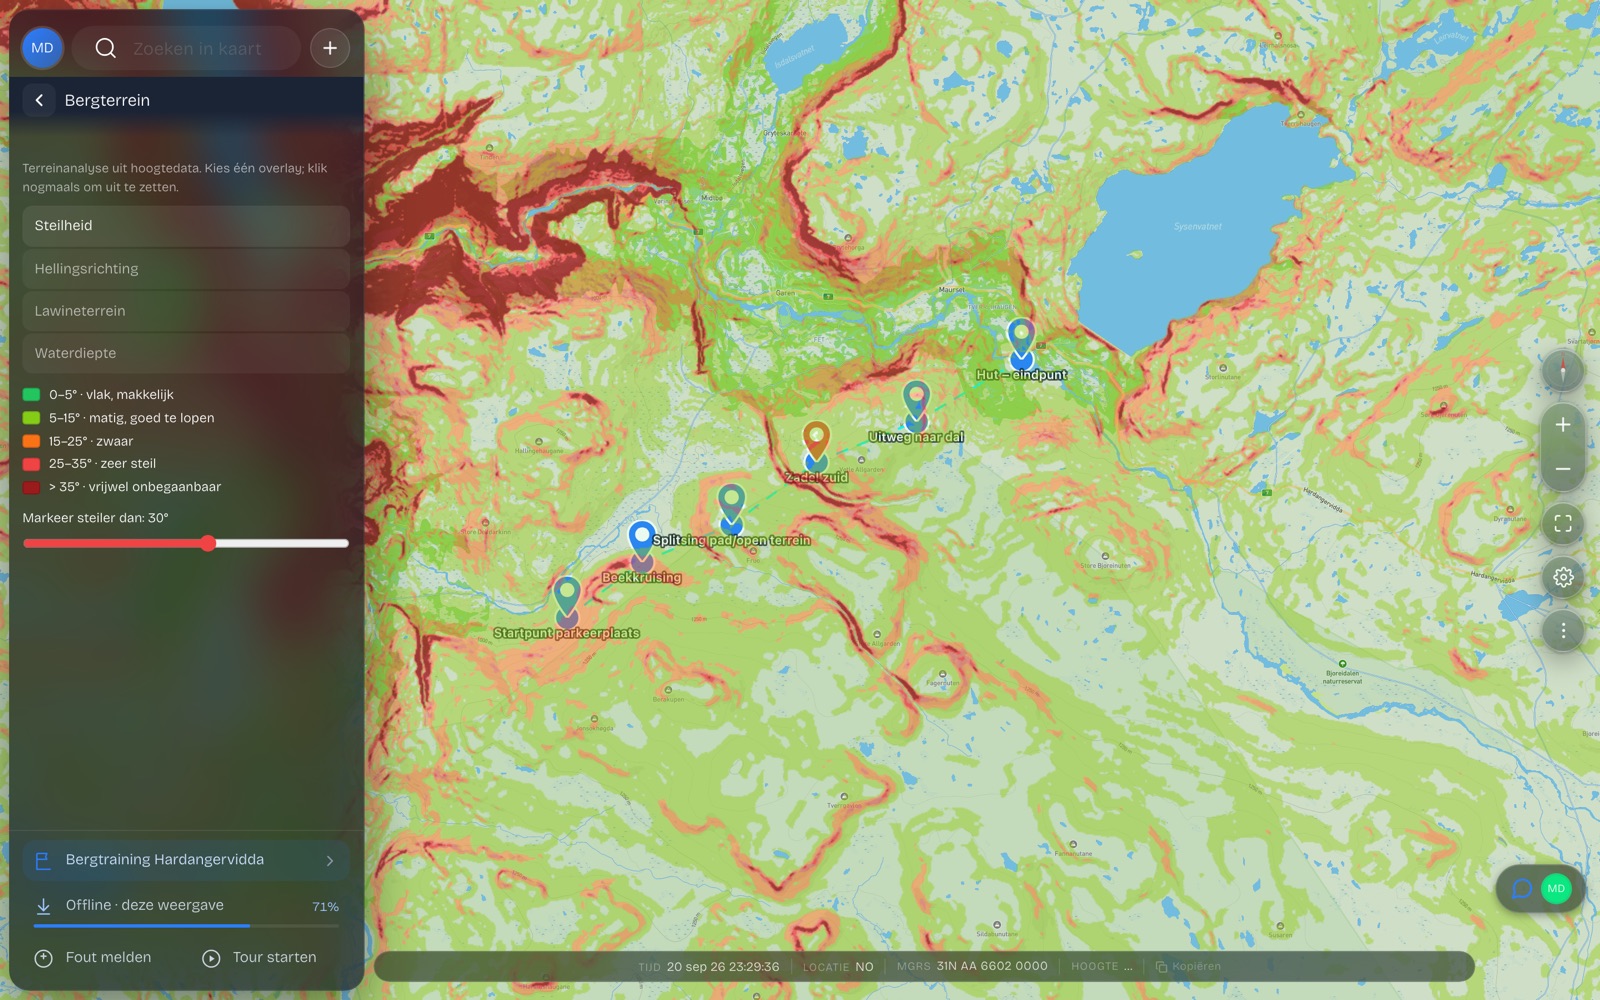
    You find the module on the map under Mountain terrain: slope, aspect, avalanche terrain and water depth. You switch on one at a time, so the map stays readable.

  2. 8.2

    Slope colours the gradient by degree. In practice: up to about 25° you still walk, 25–30° gets heavy and slippery, 30–45° is avalanche terrain, and above 45° you are talking about climbing, not walking.

  3. 8.3

    Aspect shows which way a slope faces. North-facing slopes hold snow and ice far longer and are hard in the morning; south-facing slopes thaw earlier and then turn wet and muddy. For avalanche risk, the combination of aspect and wind direction is what matters.

  4. 8.4

    Use the overlays together: a 35° north-facing slope after a day of fresh snow is exactly the terrain you want to route around, even if it is the shortest line on the flat map.

  5. 8.5

    The biggest gain is speed. Normally you are counting contour lines and estimating the spacing between them to work out how steep a slope is — a few minutes per slope, and error-prone as soon as the lines sit close together. The overlay colours that same judgement across the whole area at a glance.

  6. 8.6

    So within a minute you see which slopes drop out and which lines remain, and you keep your time for the real work: choosing the route, dividing it into legs and thinking through your variants.

The slope overlay of the mountain terrain module across the route area
More about mountain terrain analysis

Turn the overlays on while planning and off while navigating — that keeps your map readable.

STEP 09

Live weather along your route

Live weather on the points of your route, from Open-Meteo — plus precipitation radar and satellite imagery.

  1. 9.1

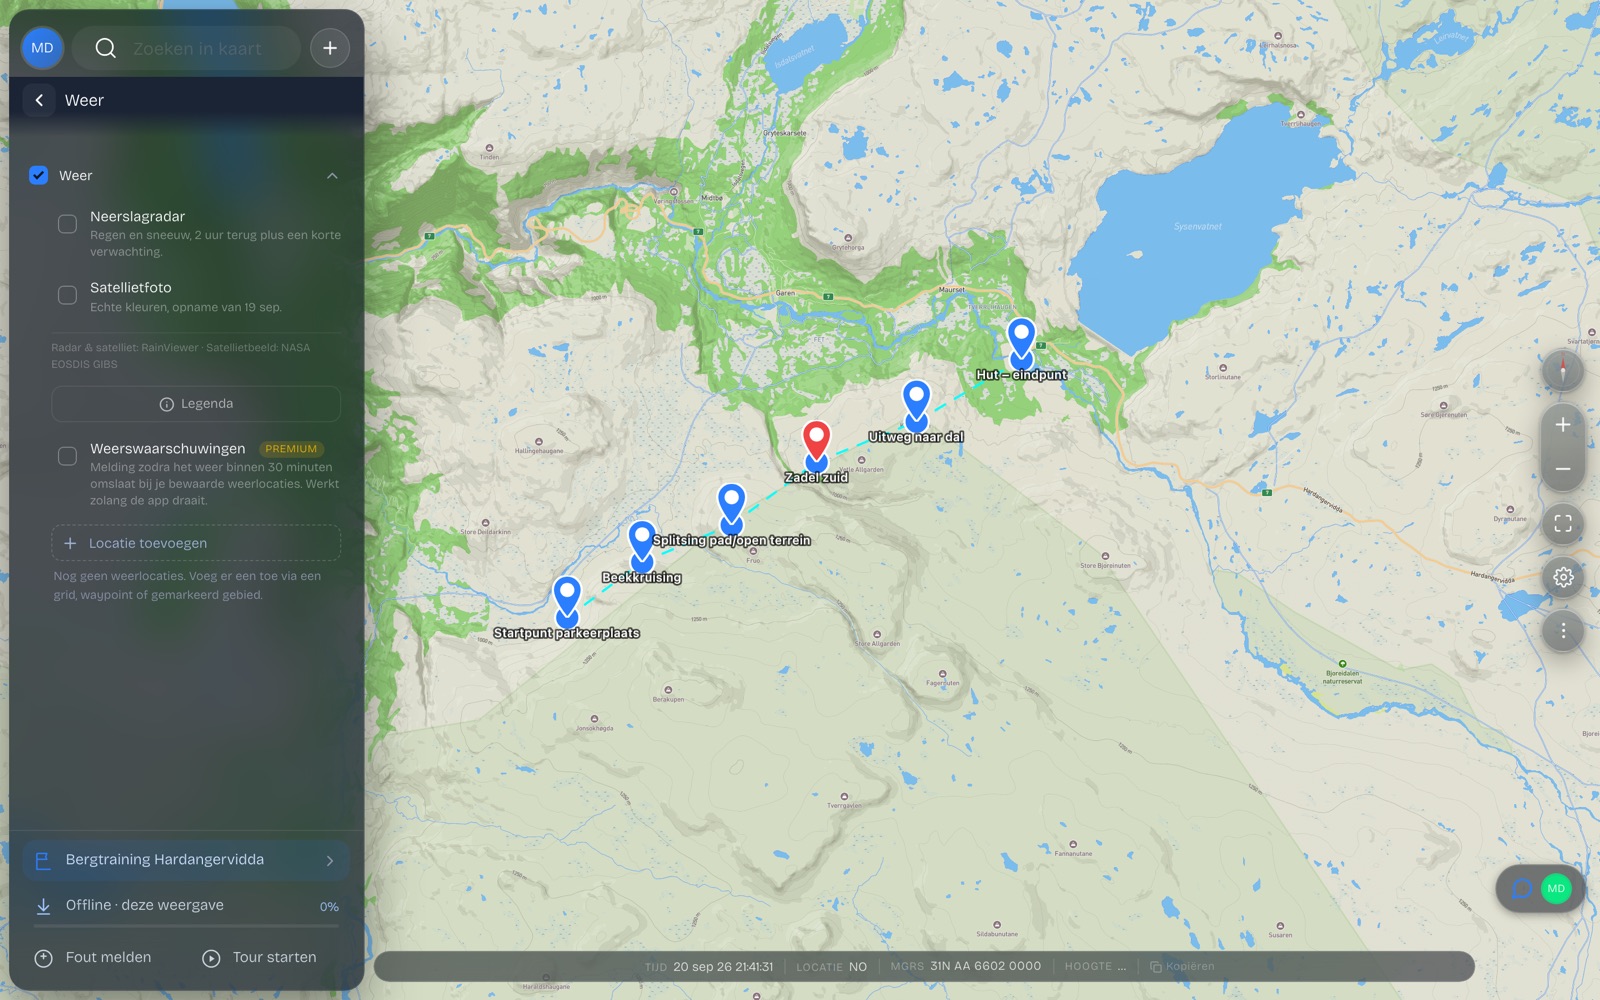
    Open the Weather layer group and add weather locations — via a grid, an existing waypoint or a marked area. For each location MilMap pulls the current weather and the forecast from Open-Meteo: temperature, wind, precipitation and cloud cover. It refreshes roughly every two hours.

  2. 9.2

    Put your weather locations on your decision points, not just on your start point. In the mountains the weather differs per valley and per altitude: between your car park at 800 metres and your saddle at 1,200 metres there is easily a few degrees and a wind force of difference.

  3. 9.3

    The same layer group holds the precipitation radar (two hours back plus a short forecast) and a true-colour satellite image. With those you see whether a shower will hit your route and how the snow cover looked a few days ago.

  4. 9.4

    Watch the wind on the high points and the freezing level in particular: that decides whether your crossing is frozen and firm or wet and slippery.

The Weather layer group with weather locations, precipitation radar and satellite imagery
More about weather integration

The source is Open-Meteo. It is a forecast, not a guarantee — always bring a local mountain weather source into your decision.

STEP 10

Print the route card on A4

Paper does not run out of battery, freeze up or break. Assume your walking group is going without phones and print the route card for everyone.

  1. 10.1

    Plan on the assumption that your walking group has no phone with them. On many exercises devices stay behind, or they fail from the cold or a flat battery. The printed route card is then not your backup but your only map — so everything you need has to be on it.

  2. 10.2

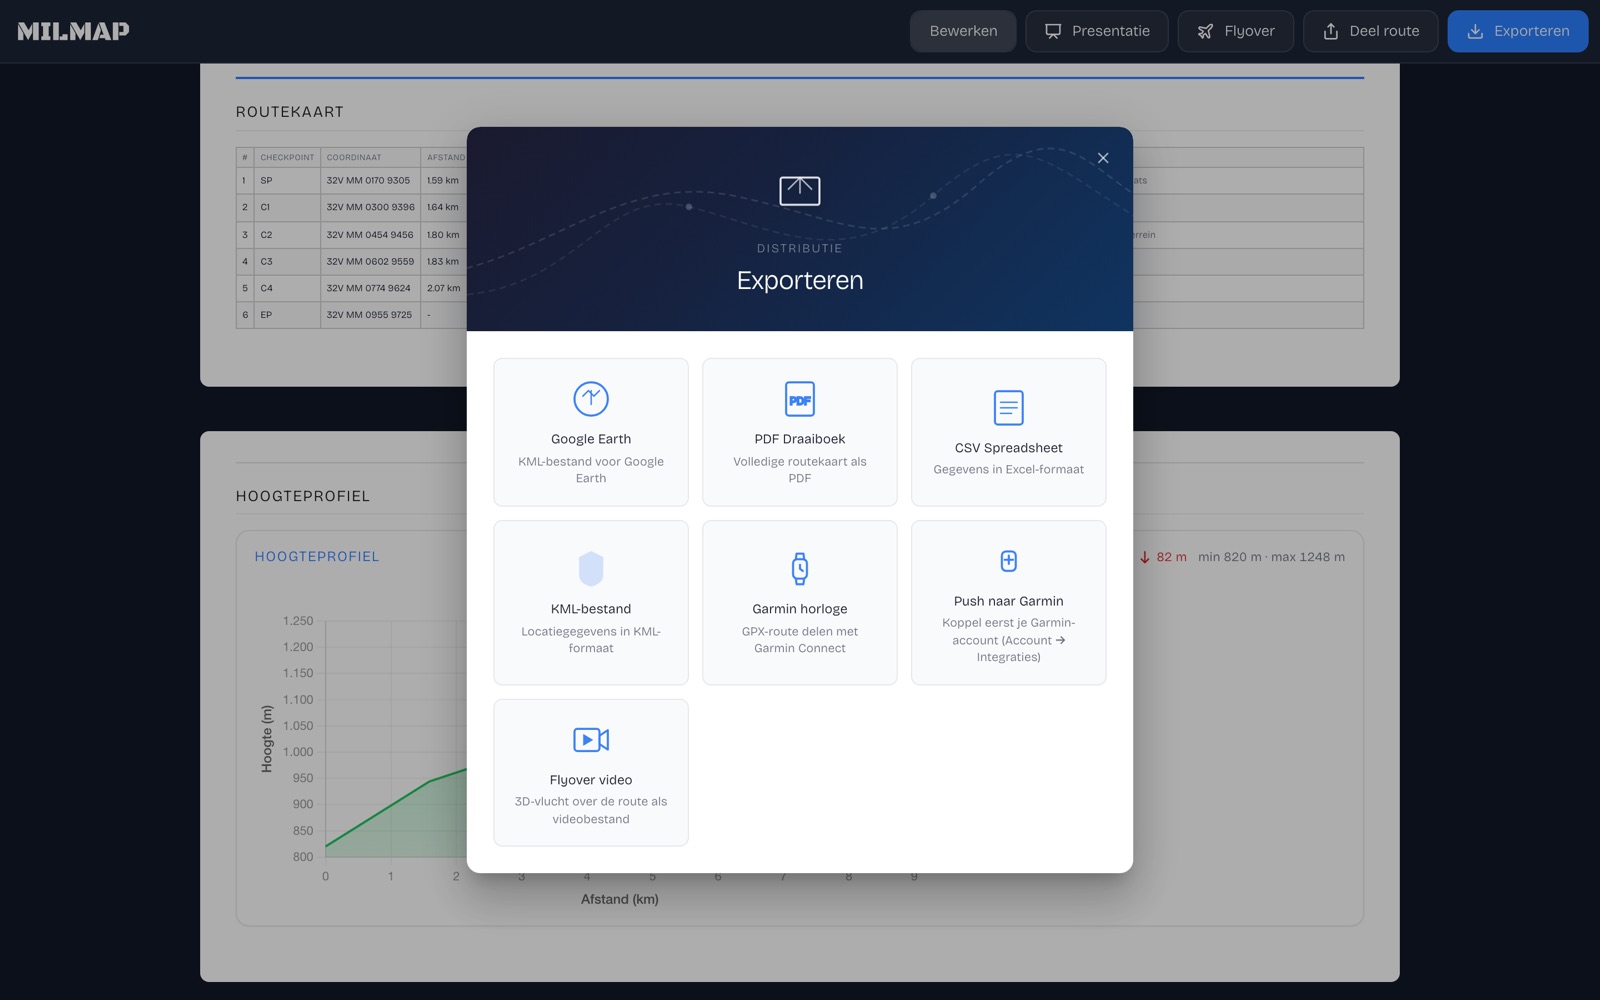
    Export your route as a PDF on A4 and switch on what you actually use in the field: the map with your route, the leg table with bearings and times, your waypoints with their coordinate, the elevation profile and your bad-weather variant.

  3. 10.3

    Leave the slope overlay off the print. On paper that colour layer makes the contour lines harder to read — use it on screen while planning.

  4. 10.4

    Print on waterproof paper if you can. Fold the sheet to A5 with your first leg facing out and slide it into your map case, so along the way you only have to turn it over instead of unfolding it.

  5. 10.5

    Give every member of the walking group their own copy — not one per group. If the group splits, everyone can carry on independently on bearing and back bearing. Put the turnaround time and the check-in moments on it in large type.

  6. 10.6

    Before you leave, walk through the print once with your compass in hand: is the declination right, can you set the first bearing, are the grids legible? What you cannot find on paper you will not find in the field either.

The export menu where you download the route card as a PDF and print it
More about PDF export

Paper is your primary fallback, not your spare. Assume your phone dies in the cold and plan so the route is walkable without a device.

What is on it

Every column of the route card

The leg table is the heart of your route card: one row per leg with everything you need to walk it with map and compass. This is what is in it — and how to read it.

#

Leg

The sequence number of the leg. You work the table from top to bottom: row 1 runs from point 1 to point 2.

Checkpoint

Checkpoint

The code or name you use to call the point — useful when you check in over the radio or when the exercise uses fixed checkpoints.

Coordinate

Grid

The coordinate of the point, in MGRS by default. This is the grid you plot on your paper map and use to pass your position.

Distance

Distance

The distance from this point to the next, in metres or kilometres. Note: this is the distance over the ground on the map, not along the slope.

Elevation

Elevation

The height of the point itself above sea level. One column gives you the height profile of the whole route.

Climb

Climb

The height difference to the next point, with a plus or minus in front. This number drives your time allowance: ten minutes for every 100 metres.

Bearing

Bearing

The compass bearing in degrees from this point to the next, corrected for the magnetic declination you entered for the route. You set it on your compass one to one.

Back bearing

Back bearing

The bearing the other way around (bearing + 180°). You use it to walk back, to cross-check your position and to confirm you are on the right leg.

Per leg

Time per leg

The calculated walking time for this one leg: the distance at your set pace, plus ten minutes per 100 metres of ascent or descent.

Break

Break

The break you plan at this point. It counts towards your total time, so your arrival time matches reality.

Total

Total time

The running total up to and including this leg, breaks included. This is the column you check against your watch along the way.

Description

Description

Your own note for the point: what to look out for, what the landmark is, or which decision is made here.

Above the table: the header fields

You fill these in once per route. They appear on the print and determine how the table calculates.

Pace
1st line 5 km/h, 2nd line 4 km/h or 3rd line 2 km/h — drives every time in the table
Declination
the magnetic deviation for your area; all bearings are corrected for it
Date and time
departure date and time, so the total time reads as clock times
Unit and strength
who is walking, and how many
Callsign, IC and CS
call sign, commander and second in command
Map sheet
which sheet your paper map is
VTV / VTA
departure time at the start point and at the arrival point

Zet je kolommen in de volgorde waarin je ze in het veld gebruikt — grid, koers, tegenkoers, afstand, tijd — en laat weg wat je toch niet afleest. Een kortere tabel met grotere letters lees je met natte handschoenen een stuk sneller.

Background

Three things that make or break your route

How the time calculation works, when to let go of the shortest line, and what the outcome can and cannot tell you.

Worked example

Direct line or contouring?

Over the ridge

  • Distance: 4.0 km
  • Ascent: 500 m · descent: 500 m
  • Allowance: 10 × 10 min + 10 × 10 min = 100 min

Contouring through the valley

  • Distance: 6.5 km
  • Ascent: 120 m · descent: 120 m
  • Allowance: 1.2 × 10 min + 1.2 × 10 min = 24 min

The detour is 2.5 kilometres longer, but saves a good seventy-five minutes of height allowance — and your walking group arrives a lot fresher. This is exactly the difference MilMap shows you once you draw both variants as routes.

Before departure

Checklist

The first part always applies. After that it depends: does the walking group set off with devices, or are they walking on paper?

Always — however you walk

  • Route in legs, with a recognisable end point per leg
  • Waypoints on every decision point, with a photo on the tricky ones
  • Bad-weather variant and evacuation route drawn in
  • Mission with timeline, split times and a hard turnaround time
  • Slope and aspect checked on every slope above 25°
  • Forecast checked per waypoint, including wind on the high points
  • Flyover run with the walking group — the variant too
  • Declination filled in, so every bearing is right

Version A · with phones

The walking group navigates on the device. Paper comes along as a fallback.

  • Map area downloaded offline on every device
  • Everyone logged in and added to the mission
  • Devices fully charged, power bank and cable packed
  • Device carried warm — cold halves your battery life
  • One printed route card per group as a fallback anyway

Version B · without phones

Devices stay behind. Everything you need is on paper — or you copy it out by hand.

  • Route card printed on A4 for every single participant, not one per group
  • Leg table on it: grid, bearing, back bearing, distance, climb and time
  • No printer? Copy the grid, the bearing and the time for each leg onto your route card by hand
  • Turnaround time and check-in moments in large type on the sheet
  • Paper topographic map and compass along, declination noted
  • Print folded to A5 in the map case, first leg facing out
  • Waterproof paper, or a map case that really seals
  • One copy with the bad-weather variant and the evacuation route with the commander

Questions about MilMap?

Do you have questions about MilMap? Email Jan Kaas — he will help you get going with the app, your map, your route and your mission.

Or email directly at support@milmap.nl

Ready to plan

Create an account, set up your first map and work through these steps once from start to finish.